

21 Mar Finding Good Lighting in Your Home
Birthday celebrations, a baby’s first steps, Christmas morning, graduation parties – great moments in our lives happen at home. You will naturally have your camera out, and you want your photos to be as beautiful as the memories you are documenting. Taking pictures indoors is tricky. Sometimes they turn out great, but most of the time they are dark, blurry, or too yellow. When you use the flash you get red eyes and harsh shadows. What can you do to make them look better? Here are 3 things you can do to get beautiful photos in your home.
1. Find the Natural Light
Natural lighting is beautiful and flattering. When it falls on your subject in just the right way it is magic. Search around your house for where the light comes in. North facing windows offer the most beautiful non-direct lighting for your photos, but any large window will do. This is what I do when I go to my newborn sessions or a family session in the home. I look in every room and search for large windows.
Once you find the light place your subject either facing it, or for more depth and interest, place them so that only one side of their face is towards the light. Sliding glass doors are fantastic! I love them because they bathe the room in such beautiful light. In the photo on the left below his face is lit beautifully by the light from the outside. I love the way the light highlights his face and drops off behind him.
The photo on the right was taken on the same day in one of my favorite spots for taking photos in my house. The corner of the living room has a window on each wall. Below you can see there is light falling on his face from the front and the left side. There is a window behind me and to my left. Be careful not to block too much lighting by standing between the window and your subject. I move and adjust to make sure I’m not blocking the good light.
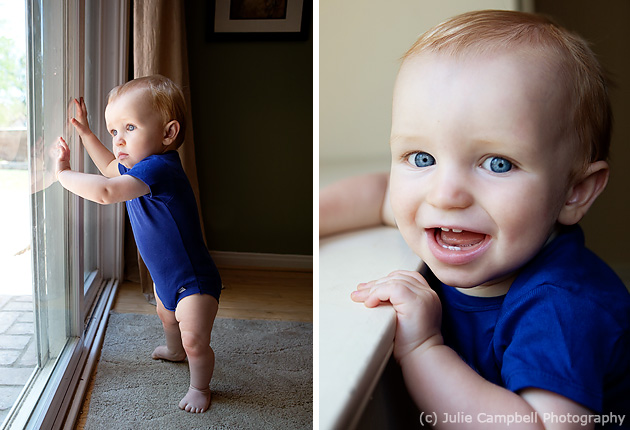
Don’t be afraid to turn your subject so that the light from the window hits them from only one side. This is the best lighting because it’s not flat. It falls on your subject’s face gradually highlighting the curves and special features that makes them beautiful. Don’t be afraid of dark areas in your photos.

Open the front door. This is the perfect option if it is a dark day and you aren’t getting a lot of light through the windows. I love to do this when I want the background darkened. You stand just outside the door and put your subjects just inside the doorway. The beautiful even lighting will fall right on your subject, and everything in the background will be darkened.
The light below the window on a bright day is divine. I move furniture, toys, or whatever is below the window so I have a clean backdrop. The photo below was taken on the floor of my bedroom below a large window with lots of natural light streaming in.

Here he is looking up towards the window. You can see the light from the window in his eyes and me leaning over him to take the picture.

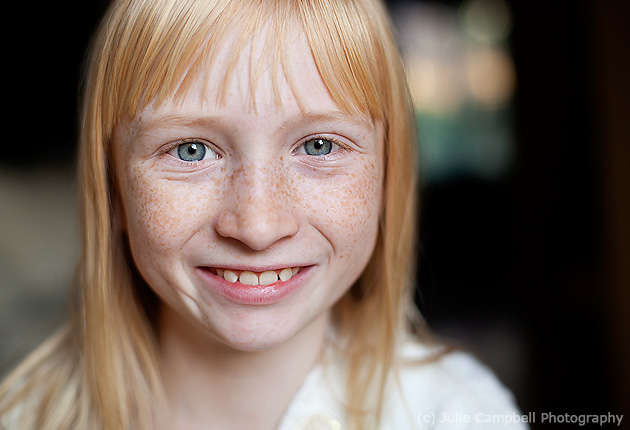
Look for natural reflectors. By that I mean bright areas that will bounce light back onto your subject. In the photo below the light is coming in (bright intense light) from behind, but the floor is reflecting the light back onto his face, which makes it work. Other reflectors might be a white wall, or light furniture.

In this next one the light is bouncing off of the white bedding and back onto his face.

2. Move the action to where the light is
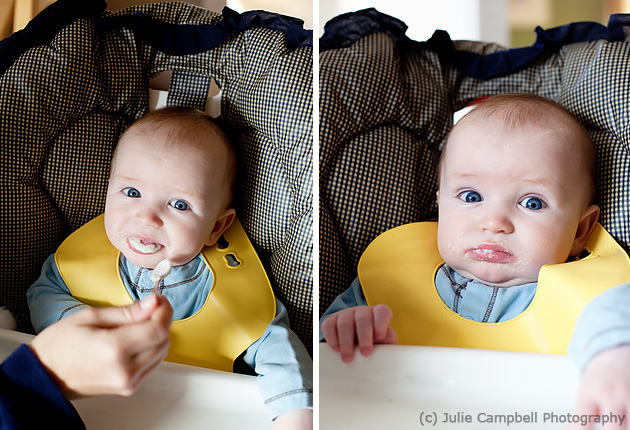
I know that not everything you want to take pictures of takes place by the window. Life happens even in bad lighting. I wish it didn’t! I do my best to move the action to the best lighting, and if I can’t, only then do I use the flash, but more on that later. For example, the picture below was taken on the day we gave my son Noah his first taste of solid food. As you can see he wasn’t a big fan. Luckily he is a good healthy eater now. I’m not ashamed to admit I moved his high chair from the place we usually keep it out into the middle of the room where the light from the kitchen window was the best.
Back in December we made gingerbread houses out of graham crackers. I didn’t just take a picture of it where it was sitting when we were done. I moved it to the special spot on my table right in front of the window.

3. Use any light source you can find.
There are times that you just can’t use natural light. In those situations you will need to use another source. It gets tricky because you run the risk of motion blur, color-casts from artificial lighting, or harsh flash lighting. Here are my recommendations. If you have to use a flash and are able, try to aim it towards the ceiling so it doesn’t hit your subjects full force. If you can’t, try covering the flash with a piece of tissue paper or something to diffuse it. Also check your camera’s white balance and change it to tungsten or fluorescent lighting depending on your lighting situation.
The picture below was taken on the night we decorated the tree last December. The kids were so excited to get out the Christmas books I keep with the decorations. As a mom these are the moments I eat up. I snuck in from behind with my camera so they wouldn’t see me and pose, or worse yet run away. The room was really dark with only the light coming from the tree and the dining room on the left. I pointed my flash towards the ceiling so that it would bounce off and fall down evenly in the room.
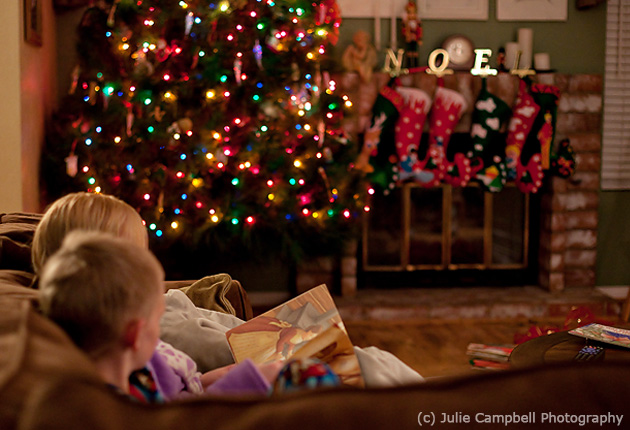
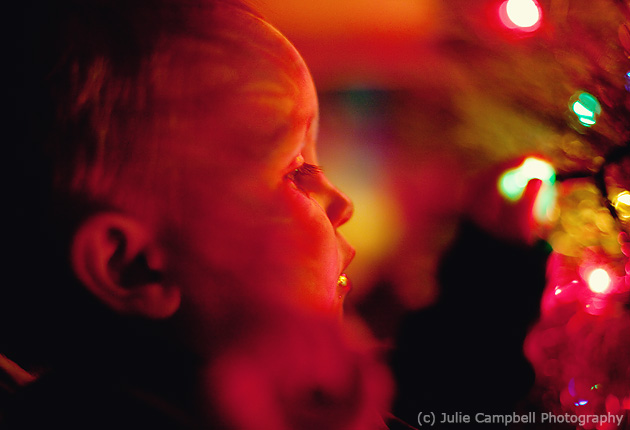
The only lighting in this picture is from the lights on the tree. I love the bright colors of the light, and the shadows of the tree. Artificial lighting gives you freedom to be creative and think outside of the box.
If you take the time to look around and find the light in the room your photos will be beautiful. Lighting is everything.
2 Comments