

11 Feb Happy Fridays: Valentines Day Crafts!

So for this Happy Friday post I wanted to do something a little different. Every time I feature one of these really great craft projects I am dieing to try them myself 🙂 Valentines Day gave me the perfect opportunity! Valentines Day can be a tricky holiday because traditionally it can be all about the chocolate and the flowers, but your kids aren’t really interested in either of those. I went through photos of several projects and picked 2 that would be perfect for a whole family, or just the kids! I also picked projects that were cheap and quick…both important things for busy working parents. Each project is also a great way to recycle a certain art supply that usually gets thrown away: crayons! How many times have you tossed away the little left over crayon nubs at the bottom of the box that are too small to color with? Or maybe a crayon breaks and can no longer be used? Now you have a solution! No excuses this weekend…it’s time to get crafting!
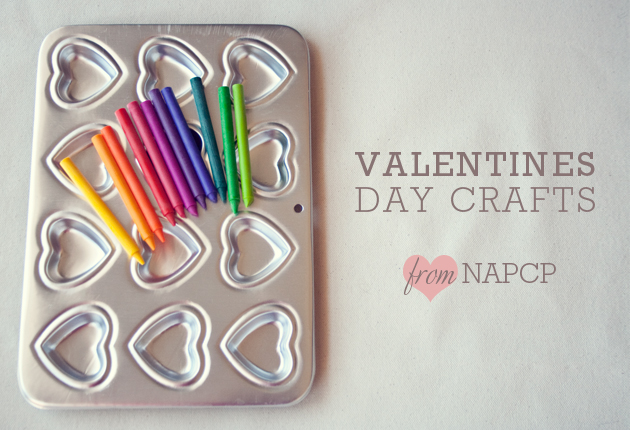
PROJECT #1 CRAYON HEARTS
Supplies: metal heart shaped baking pan, old crayons, sharp knife or scissors

1) This first project is a great way to give your child the freedom to create whatever crayon color they want! First, gather your supplies. You will need to gather bits of old crayons together and perhaps brand new ones to mix and match. You will need enough crayons to fill each mold of the heart shaped tin. I found a tin at Michael’s Crafts on sale for $4! It had twelve heart shaped molds that were about 1.5″ x 1.5″. Perfect size!
2) Once you have your supplies, you will need to start chopping up the larger crayon bits. I chopped mine up very fine because it helps them to heat up more evenly. However, if you want a more multicolored crayon I suggest mixing larger pieces together.

2) Once chopped up, set in piles on a table along with the tin. Let your kids decide which colors they want to mix together. I mixed mostly like colors for mine, adding a little white to each. The white helps create a gradient effect so that the color of the crayon changes as you color.
4) Have your oven heated to about 200 degrees. Place the tin inside for about 10-15 minutes. I have a gas oven so the crayons melted very quickly for me. If you leave them in longer the colored waxes tend to run together into a muddier solid color which isn’t very fun 🙁 Remove the baking tin and let it cool for about 20 minutes to be safe. The crayons will dry and re-harden much faster, but the tin will still be very hot.


5) Time to enjoy! Let your kids go to town coloring all kinds of new pictures! The really fun crayons were the ones I made with several colors mixed together!
PROJECT #2 TRANSPARENT WINDOW HEARTS
Supplies: Crayon shavings, wax paper, craft paper or thin towel, iron, scissors, thin ribbon or twine

1) You will need about a 12″ x 20″ sheet of wax paper. Now fold this in half length wise. You will only be covering half of the sheet with crayon shavings. Lay the wax paper on either a thin towel or a sheet of craft paper (brown paper).
2) You will need about 7-8 crayons worth of shavings to coat the entire sheet. Maybe more or less depending on the the type of crayons you want to use. I used only the pinks, reds and oranges, but feel free to let your kids use whatever color they like. You can use a crayon sharpener, but I actually found that an eye pencil sharpener worked best! Go figure 🙂
3) Once the sheet is mostly covered, fold the wax paper in half. Cinch the edges by making a 1/8″ fold on the other 3 sides. Place another sheet of craft paper on top, or a thin towel. I say thin because if you use a thick bath towel (like I did at first) the iron will not be able to melt the shavings. You will need to run the iron over the towel or paper a few times. Make sure to check every few seconds to see if the shavings have completely melted.

4) Let the wax paper cool and the crayon wax harden for a few minutes. Now trace hearts, or other Valentines day shapes, onto the wax paper. Be careful when cutting out shapes not to rip the wax paper.
5) You can hole punch and string each one or do what I did and tape the string to the back of each heart. My hearts weren’t large enough to hole punch 🙂
6) Hang in a well lit window!

I hope everyone has a wonderful Valentines Day…Happy Friday everyone!
2 Comments