
25 Jan Fashion Forward Camera Bags!
The holidays are over and now that you have that fancy camera you’d been hoping for or have resolved to take that expensive DSLR out far more often than ever before, where do you keep it? What camera bag will work best for storing it or taking it with you? You know you need a padded bag for protection but which one? And are you really going to have to carry your purse and another bag?
Well, I’m happy to report that over the last few years, camera bags have evolved. We are no longer limited to carrying around black, non-descript, rectangular, pocket-filled, zipped-up bags or backpacks (aka man bags). The choices for women have grown tremendously and we can now choose bags that not only have exceptional function (i.e., space for everything including a pocketbook, iPhone, lip gloss, keys, checkbooks, extra lens, filters, laptop, and more); they are vibrant, stylish and fashion forward. Camera bags that look like purses. Oh yes.
Function and flair underlay many of the camera bag designs these days. Here’s what I’ve found and acquired.

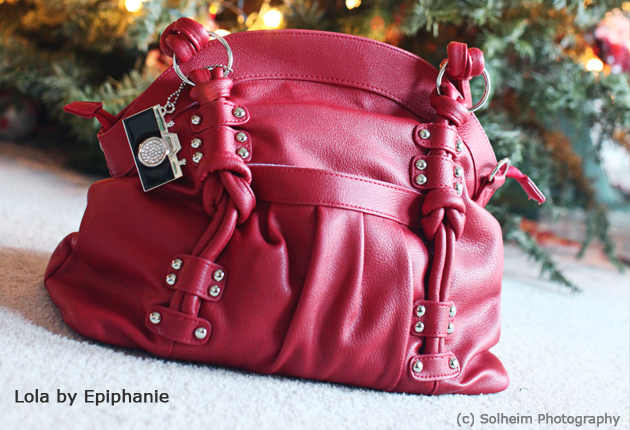
Lola bag by Epiphanie. This is my newest and sweetest acquisition. One look at it and you know what I mean by personality and style. This is the smallest of my camera bags and I anticipate using this one practically everyday. It’s large enough to carry my camera with vertical grip and a 50mm lens mounted, a 24-70mm zoom lens, a lens cloth, cleaning liquid, extra CF cards, camera battery, wallet and an assortment of other necessities (e.g., checkbook, chapstick, pens, iPhone, Digital Elph point-n-shoot camera, business cards, reading glasses). And did I mention that the interior is in lavender, rather than black? So much easier to find things. Epiphanie bags come in many sizes and styles. Check ‘em out.

IT bag by The Joy Bag collection. My other most used camera bag isn’t really a camera bag at all. It’s a tote bag insert. If you’re not into purses, this is worth a look. Basically, the padded insert can be placed into any tote bag and – voila! A camera bag. This is the ultimate in flexibility. I use this when I carry a few more things like a mini tripod or my laptop or iPad or sweater (you get the idea) than what I normally put in the Lola bag.
Jill-e Rolling Red Leather Bag is my storage bag. It holds all of my camera gear. It rolls around and saves my back. It is made of red leather. If you didn’t know what was in it, you wouldn’t guess it was a camera bag at all…just a nice red leather travel bag on wheels. In a different color such as black or gray, it appeals to male photographers as well. Jill-e Designs offers several sizes and models.
Shootsac Lens Bag is my workhorse during shoots. This is the body-hugging bag I wear on-the-shoot that carries my extra lenses, car keys, iPhone, CF cards, etc. It’s lightweight and holds my lenses tightly so that I never worry they’ll fall out. I also have a couple of different covers – one is a solid bright red and the other is a colorful floral one – for a bit of flair. Oh and by the way, lots of guys appreciate this one, too, though probably with the standard black cover.
Glee Bag from The Joy Bag collection. My other workhorse camera bag on-the-shoot. When I decide to carry two cameras where one is loaded with my 70 mm – 200 mm lens, this is it. With my camera and zoom lens in here, I don’t worry that I’m going to bump my camera into something while I’m shooting with the other.
Different bags, different needs. There’s a camera bag for every taste, use and activity. In addition to the ones I own, here are a few more designers I checked out: Kelly Moore, Jo Totes, Emera, Ona, and Cheeky Lime.
No Comments